Multi-Factor Authentication on O365
A NOTE TO THE RESIDENTIAL DEPARTMENT:
Please DO NOT register the house land lines as the contact number for MFA.
In an effort to secure our accounts here at the agency, we will be requiring users to set up multi-factor authentication on their O365 accounts (SharePoint and Email). What is multi-factor authentication, or MFA? You already use this if you use an ATM card to access your bank account. You need both your ATM card and the PIN to get into your account. Each is a factor that must be present, or you don’t get in. In the case of your O365 account, MFA requires that in addition to your password, that you provide an additional piece of information to prove your identity. You will either provide a telephone number so you can receive a text with a code, a phone call with a code, an email address, or use the Microsoft Authenticator app to generate a code. Let’s take a look at how we set up the text/call and email options first.
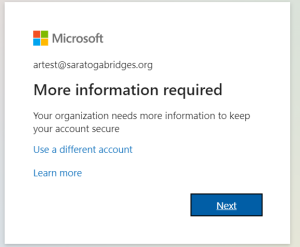
Once your account has been set up to require MFA, you will receive a screen like this letting you know you need to begin the set up process:
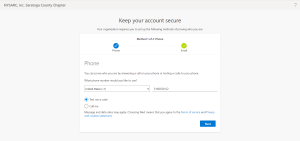
Clicking Next will take you to the screens where you will provide a phone number and then an email address. Here’s the first screen:
If you would like additional information on setting up your phone and email as contact points, follow this link from Microsoft.
To sign in with a notification from the Microsoft Authenticator app
You can also use the Microsoft Authenticator app to sign in. Use this link to download the app to your iOS or Android device.
Once you have downloaded the Authenticator app, you can receive push notifications on your device, or you can open the app to get a verification code. Next, follow these steps:
- Sign in to an application or service such as Microsoft 365 using your username and password.
- Microsoft sends a notification to the Microsoft Authenticator app on your device.
- Open the notification on your phone and select the Verify key.
To sign in using a verification code with the Microsoft Authenticator app
If you use the Microsoft Authenticator app to get verification codes, then when you open the app you see a number under your account name. This number changes every 30 seconds so that you don’t use the same number twice. When you’re asked for a verification code, open the app and use whatever number is currently displayed. Here’s how this works:
- Sign in to an application or service such as Microsoft 365 using your username and password.
- Microsoft prompts you for a verification code.
- Open the Microsoft Authenticator app on your phone and enter the code in the box where you are signing in.
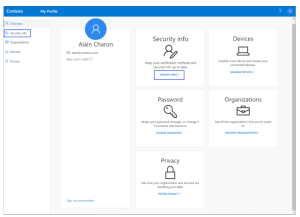
Once you have established your MFA methods, you may want to make changes when something changes, e.g., you get a new phone or PC. Here’s a handy link that will take you right to the page where the old devices can be removed and the new ones added: Security Info Page
Note to users of the Outlook application installed on PCs, phones, and tablets:
If you use the Outlook app for email, in contrast to getting your email using a web browser, you will need to establish a different app password for each device with Outlook installed. Here is how you set up an app password:
1. Click on the Logon to the employee portal button on the employee page and sign in to your O365 work or school account and then go to your My Account page.
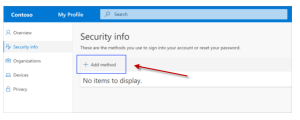
2. Select Security info from the left navigation pane or from the link in the Security info block, and then select Add method from the Security info page.
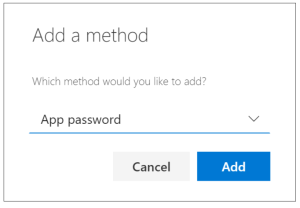
3. On the Add a method page, select App password from the list, and then select Add.
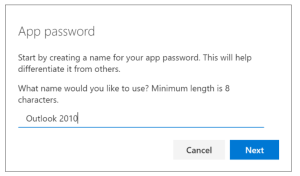
4. Type the name of the app that requires the app password, and then select Next.
5. Copy the text from the Password box, paste (Ctrl-V) the password in the password area of the app (in this example, Outlook 2010), and then select Done.

6. Open the app you created the app password for and paste the password when asked for it. You should only have to do this once per app.